About / Falkon

Falkon is very fast Qt based browser. It is actively developed and uses open standards (so it's easier for programmers to work with it). It aims to be a lightweight web browser available through most major platforms. Previously it was called QupZilla.
The project was originally started for educational purposes. From the start QupZilla to Falkon has grown into a feature-rich browser. The very first version of QupZilla was released in December 2010 and it was written in Python with PyQt4 bindings. After a few versions QupZilla has been completely rewritten in C++ with the Qt framework. When the migration to Falkon occurred CMake was implemented instead of the traditional QMake from Qt. Additional build environment tools will be needed in addition to Qt due to this move.
Falkon ships with its own port of Greasemonkey as an extension.
Installing GreaseMonkey
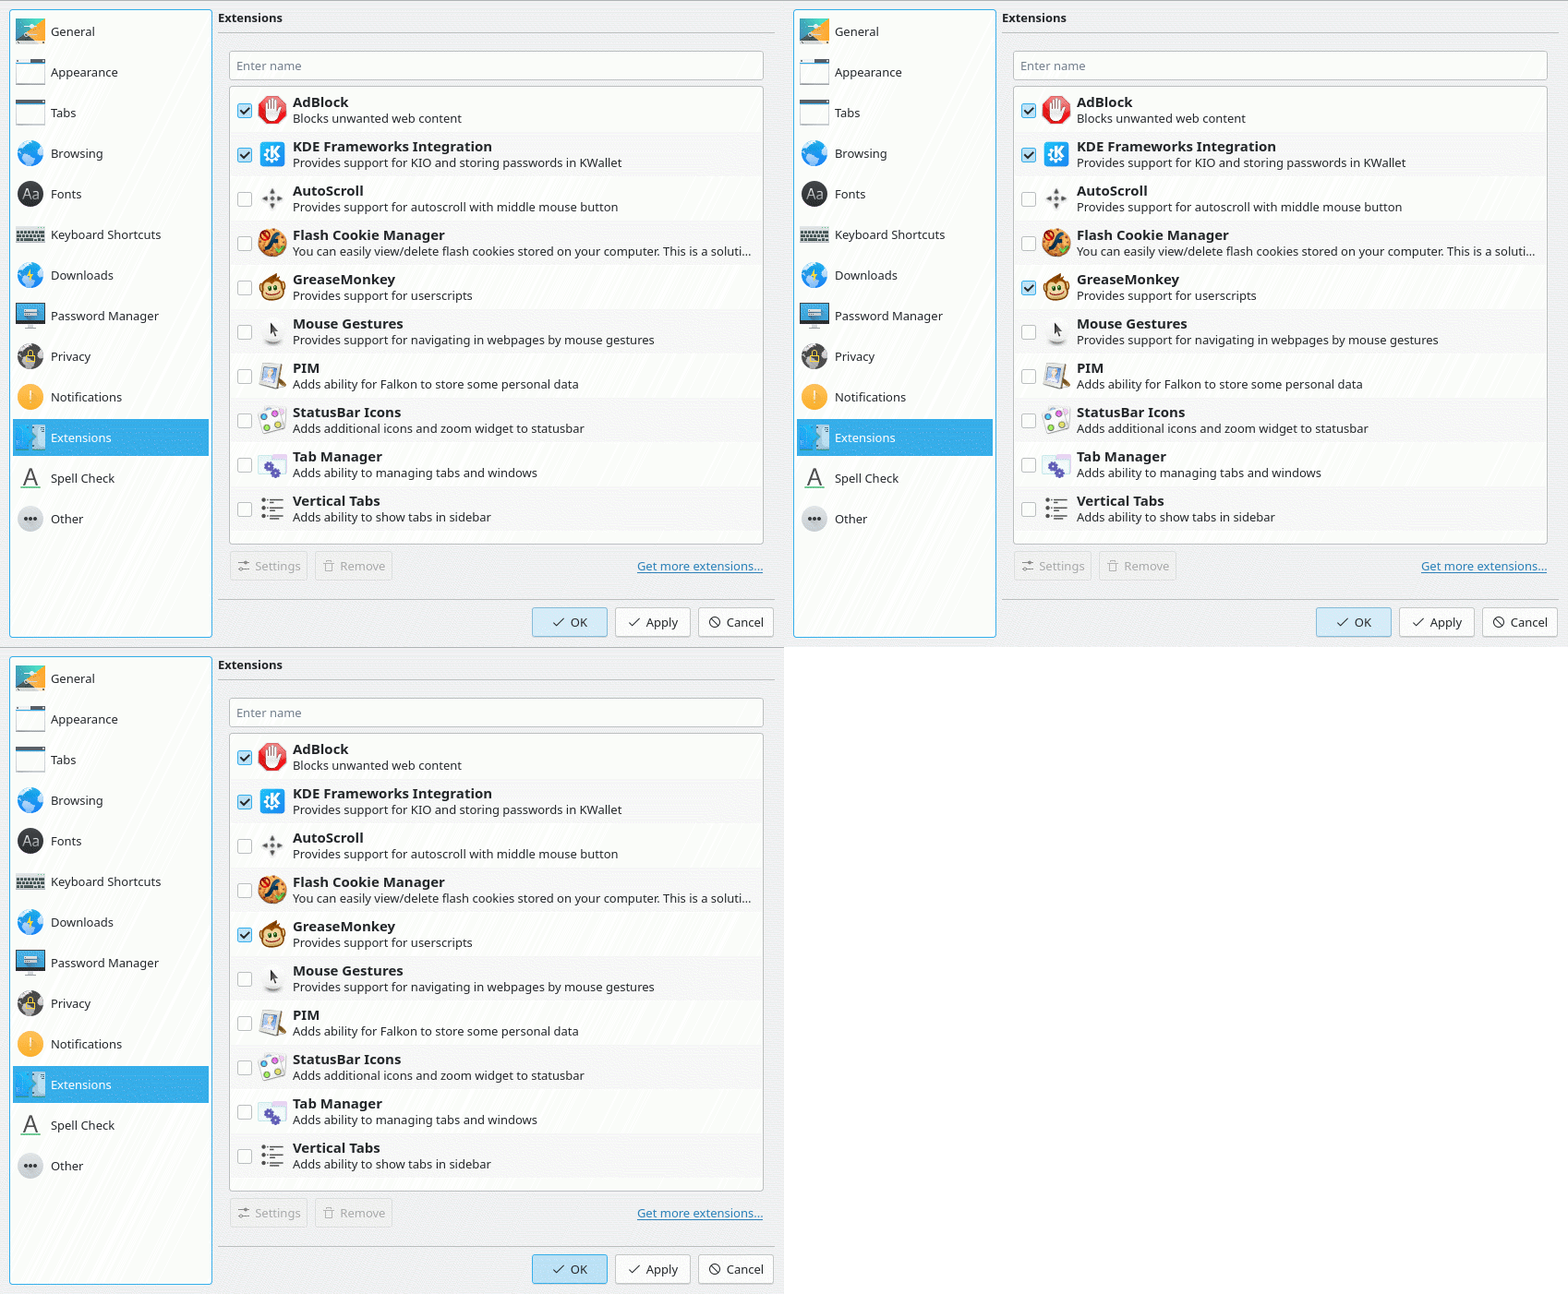
To get userscripts going with the GreaseMonkey Extension, first you have to enable it from the Preferences → Extensions menu item by selecting GreaseMonkey in the list and then click the checkbox, and finally clicking the "OK" button.
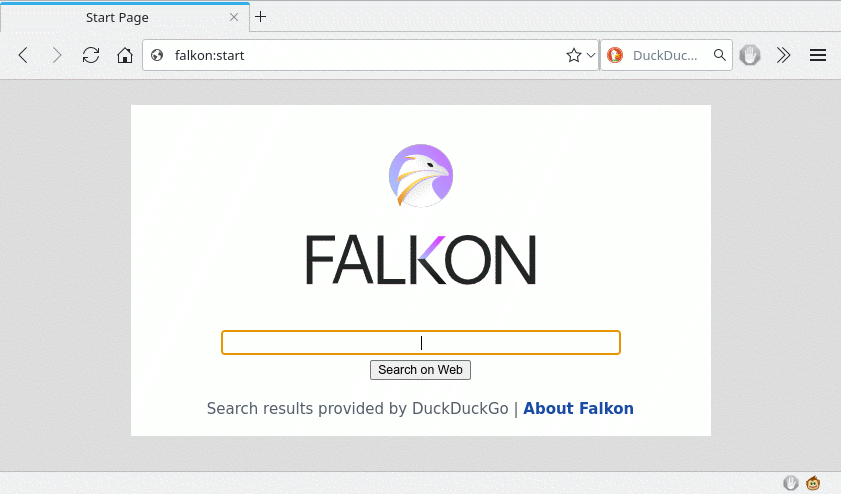
Once it is enabled turning on the View → Status bar menu item will show the GreaseMonkey icon in the status bar.
Installing Userscripts
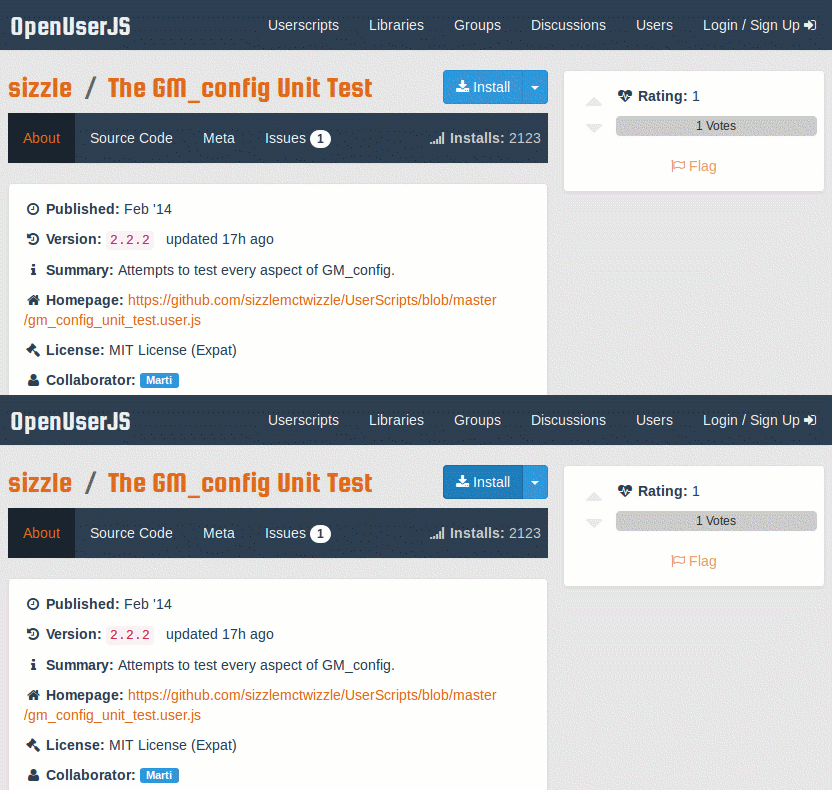
Once GreaseMonkey is enabled, installing userscripts from OpenUserJS.org is simple. Navigate to the OpenUserJS page for the script, then click the blue "Install" button at the top of the page.
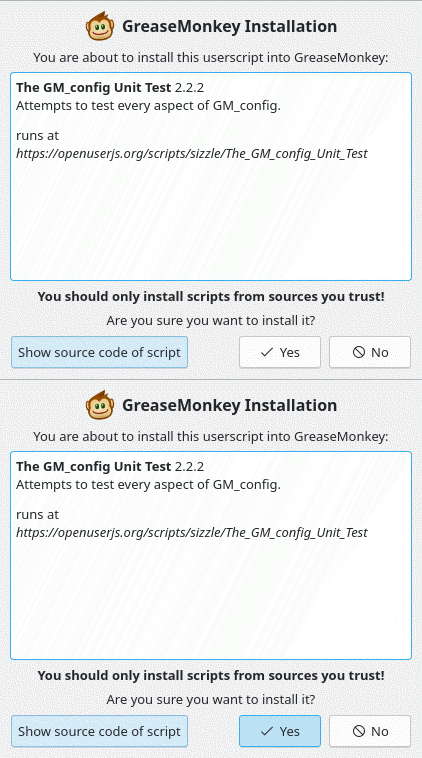
Falkon via the GreaseMonkey Extension will display a screen showing you what websites it can access, optionally the source code, and a warning to only install scripts from sources that you trust. If you do want to install the script, click the "Yes" button, otherwise click "No".
Installing userscripts from other sources is a similar process. You just need to find the installation link for the script. This will be a button or link to a file with a name that ends ".user.js"
After installing a userscript, you won't normally notice any further changes until you visit a website that it runs on.
Managing Userscripts
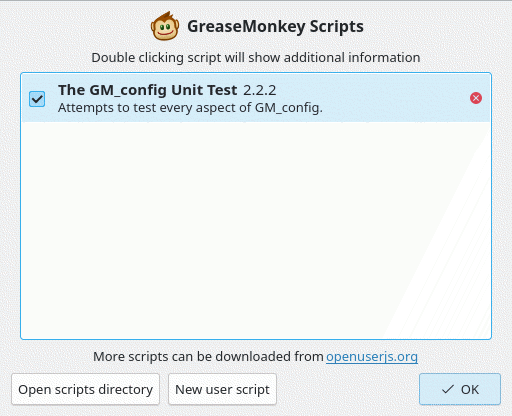
Clicking on the GreaseMonkey icon at any time will pop up a dialog that shows you what userscripts are installed. This is also available from the Preferences → Extensions menu item by selecting GreaseMonkey in the list and then clicking the "Settings" button.
Trouble shooting
If you think a userscript is causing problems, the easiest way to check is to switch off GreaseMonkey, reload the web page, and see if the symptoms go away. You can do this by opening Preferences → Extensions menu item and select GreaseMonkey and then untick the checkbox, then the "OK" button. If it looks like a script problem and you have more than one script running on a web page, you can disable them all in GreaseMonkey's dialog "Settings" button, or the status bar icon, then re-enable them one by one, until you find the culprit. Remember to reload the web page each time - userscripts normally only run when a web page loads.
Sometimes, when you use more than one userscript on the same web page, they need to run in a particular order. You can change the order by renaming the .user.js files and references there-in manually by clicking the Open scripts directory button.
Debugging
Enabling the remote debugging feature with Ctrl + Shift + i an environment variable may need to be created in some versions of Falkon using a name of QTWEBENGINE_REMOTE_DEBUGGING and an available numeric TCP port such as 12345. This applies to all available platforms.
Optional Compiling
After installing the necessary dependencies:
Building on Linux platforms
... use some variant of these bash terminal commands for Linux and the Qt Unified Installer path (or whatever path to a supported Qt):
$ # Anonymous checkout
$ git clone git@invent.kde.org:network/falkon.git
$ cd falkon
$ # Cleanup build directory if needed for cmake pitfalls
$ rm -Rf build
$ # Switches for cmake do not always work so use native environment variable
$ export CMAKE_PREFIX_PATH=/opt/Qt/5.11.1/gcc_64/
$ # Ensure folder exists and change into it
$ mkdir build && cd build
$ # Similar to `qmake` and `./configure`... note the dot dot is required
$ cmake ..
$ # Typically an alias to `gmake`. Does currently support parallel compiling
$ make
$ # If everything goes well then optionally install it
$ sudo make install
Submitting patches
Patches are usually submitted by using $ git diff > mypatch.diff to KDE.
More
-
- NOTE: At the time of writing the flatpak repository appears to have a newer version than the snap repository. The snap repository may not include the GreaseMonkey extension. See their download link for specific package repositories.